Urushi is the sap from the Urushi
Tree, rhus vernicifera, which is related to the poison ivy plant because
the tree's sap contains an oil, urushiol, which can cause an allergic
reaction, typically a rash. (Urushi, 2016) When using urushi, it
is suggested that non-latex gloves, long sleeve shirt, respirator, and
safety glasses be worn to reduce the chance of coming in contact with
the urushi. While I was using the urushi, I wore only the
non-latex gloves and long sleeve shirt and still managed to get a rash.
The following process for using urushi, on armor, can be found in
The Manufacture of Armour and Helmets in Sixteenth Century Japan, by
Sakakibara Kôzan. It is an 11 step process which was used to
finsh the surface of armors during and before the 16th century. I
started learning how to use urushi by starting with a small 16ga steel
test plate. Urushi, when applied to armor, was used on both steel
and nerigawa (a flexible and semi-translucent rawhide). The armor
was also finished both outside and inside, although the inside did not
have as many layers as the outside (only 8 layers) as a lining was
installed which covered the inside of the armor. This is just a
very basic understanding of the process of using urushi. There are
many more urushi recipes, that I do not know, which create the different
surfaces and textures on some armors. The recipes used here can be
found in the references.
Process:
Plate Prep: The steel plate, 18ga, was prepped by
sanding the surface with a coarse sanding disc on a grinder. The
period way would have been done with a coarse whetstone, leaving the
hammer marks in the surface of the steel.
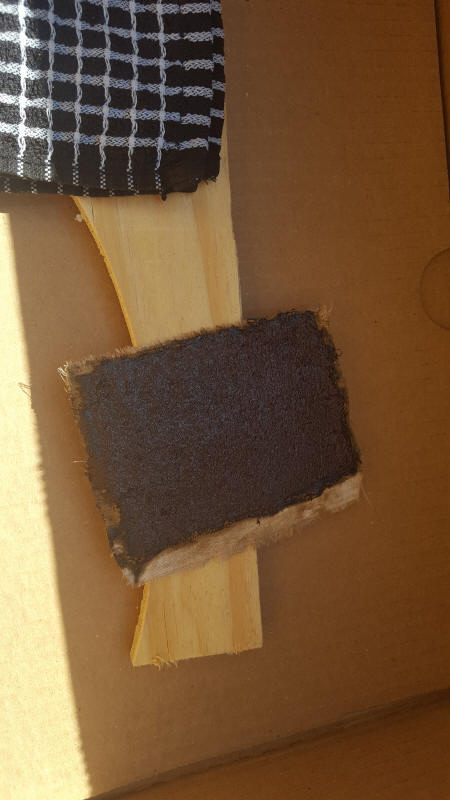
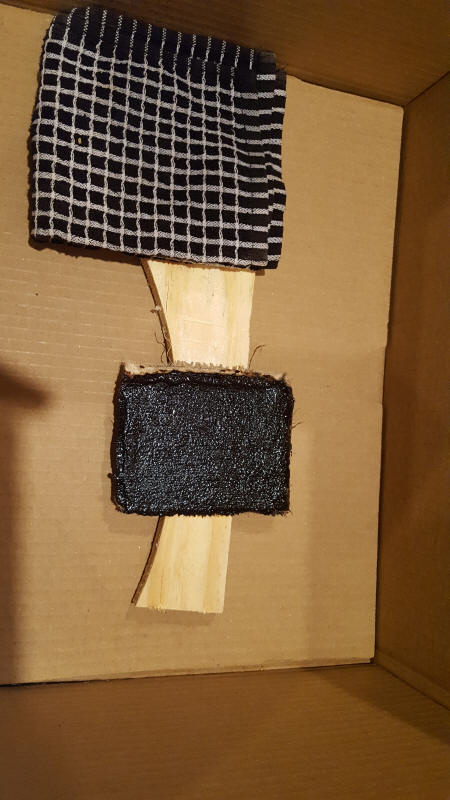
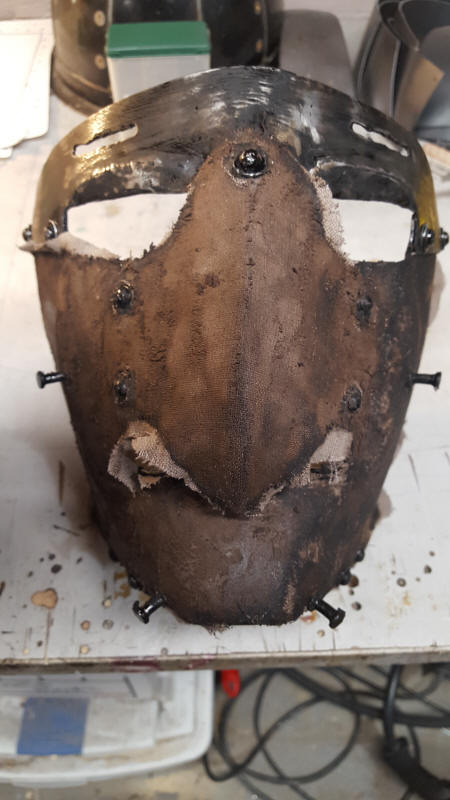
Layer 2: Mugi-Urushi A mixture of wheat flour (mugi-ko) and seshime-urushi. The mugi-urushi is laid over a covering of cloth. The cloth is a complete overlay, meaning, it covers both the front and the back of the plate. For the test plate, I only covered the front of the plate. I also used a thin layer of the mugi-urushi to hold the cloth in place before appling the mugi-urushi on top of the cloth. Seemed to make sense, as the cloth would have moved around too much if I just applied the mugi-urushi on top of the cloth. I allowed this layer to cure for 2 days in the muro. After curing, this layer is sanded smooth to prep it for the next layer.
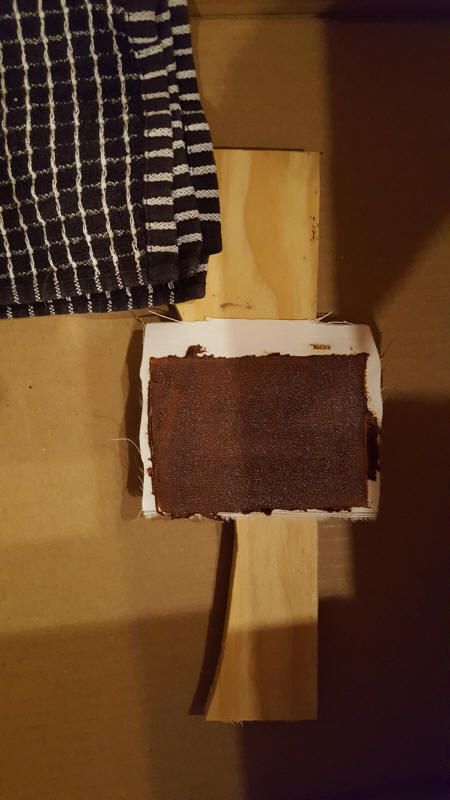
Layer 3: Kokuso This layer is used to fill in any uneven spots on the armor's surface. A mixture of chopped hemp, wheat flour, and seshime-urushi is used for this purpose. Since the test plate was flat, I did not feel that I needed to do this layer. If this layer is used, then it needs to cure in the muro for 2 days. Once cured, it is sanded smooth to prep it for the next layer.
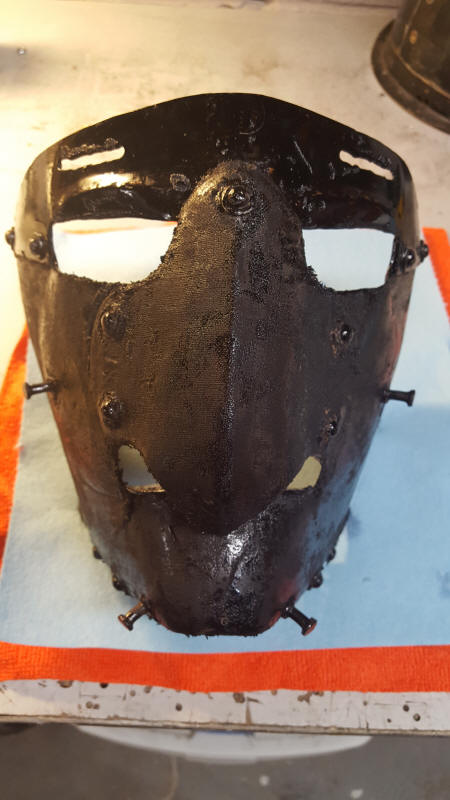
Layer 4: Seshime-Nuri A thick layer of seshime-urushi is applied to give the cloth layer a smooth surface. I applied just enough seshime-urushi so the surface looked even. I allowed this layer to cure in the muro for 2 days. Once cured, it is sanded smooth to prep it for the next layer.
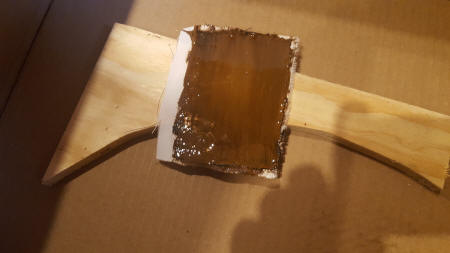
Layer 5: Sabi-Nuri A mixture of seshime-urushi and Tonoko (clay), is applied in a thin layer over the surface. I applied as thin of a layer as I could. I then allowed this layer to cure in the muro for 2 days. Once cured, it is sanded smooth to prep it for the next layer.
Layer 6: Sabi-Gatame-Nuri This layer is a repeat of Layer 5. I allowed this layer to cure in the muro for 2 days. Once cured, it is sanded smooth to prep it for the next layer.
Now the Finishing layers are done.
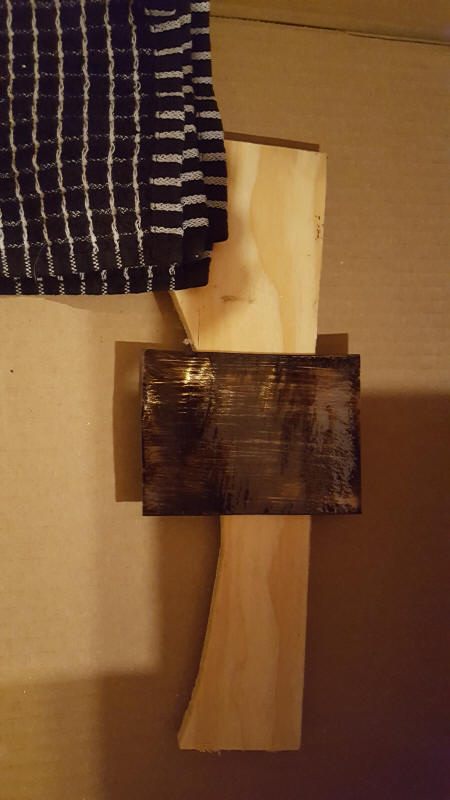
Layer 7: Ro-Iro A thin layer of Kurome-Urushi (Black Lacquer) is applied. This layer is the base layer for all the finish layers, and I applied it as thinly as possible. I then cured it in the muro for 6 days. Once cured, this layer as sanded smooth ro prep it for the next layer. This layer needs to be as smooth as possible.
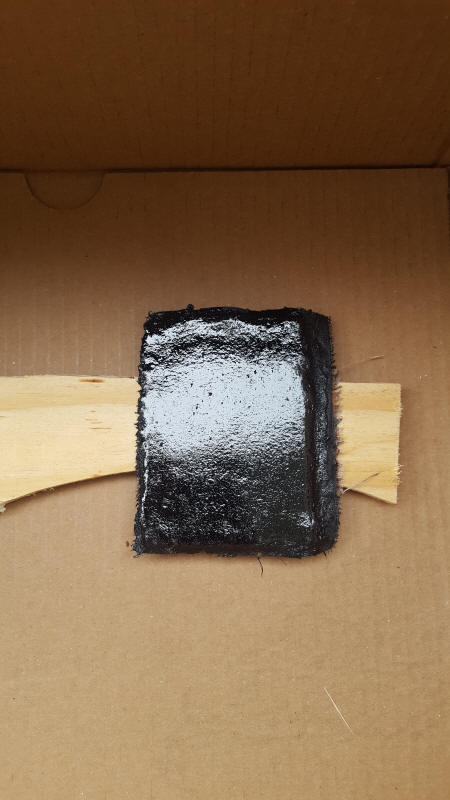
Layer 8: Ro-Iro Same as Layer 7. I allowed this layer to cure in the muro for 6 days. Once cured it is sanded smooth to prep it for the next layer.
Layer 9: Ro-Iro Same as Layer 7. I allowed this layer to cure in the muro for 6 days. Once cured it is sanded smooth to prep it for the next layer.
Layer 10: Ro-Iro Same as Layer 7, except, after this layer is cured for 6 days, it is polished with charcoal powder and calcified deer horn.
Layer 11: Ro-Iro Same as Layer 10. After curing for 6 days, this layer is polished the same as the previous layer. Once this layer is finished, it should have a dull black appearance, which is preferable. According to Sakakibara Kozan, armor lacquered as described above will withstand soaking in water for months at a time; it will not easily chip, nor will its apperance be affected by cold or hot weather.
Pandikow, Wiebke. Silver Crane. Dec. 2012. "An Exchange Student's Research on URUSHI." 15 March 2018 <http://silver-crane.com/index.php/urushi/>.
Sakakibara Kôzan. The Manufacture of Armour and Helmets in Sixteenth Century Japan. Trans. by T. Wakameda. Revised by A.J. Koop and Hogitarô Inada (1912).
“Urushi”, the Beautiful and Dangerous Art of Japanese Lacquerware. 2 Aug 2016. Japan Info. 29 April 2018. <http://jpninfo.com/56468>.
Urushi Finish
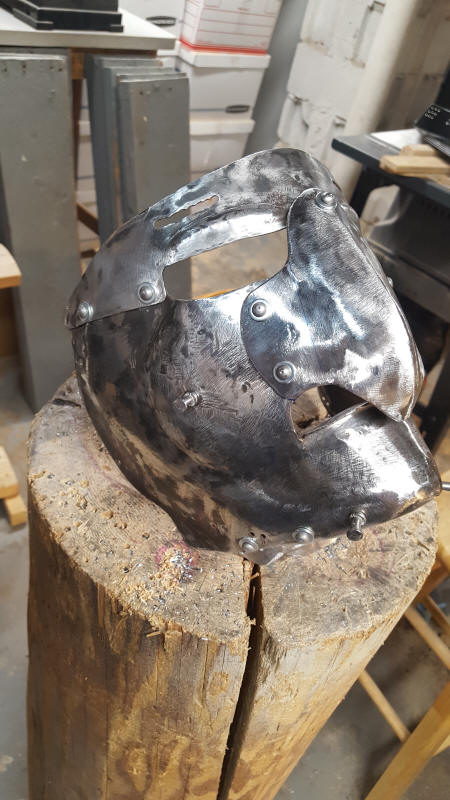
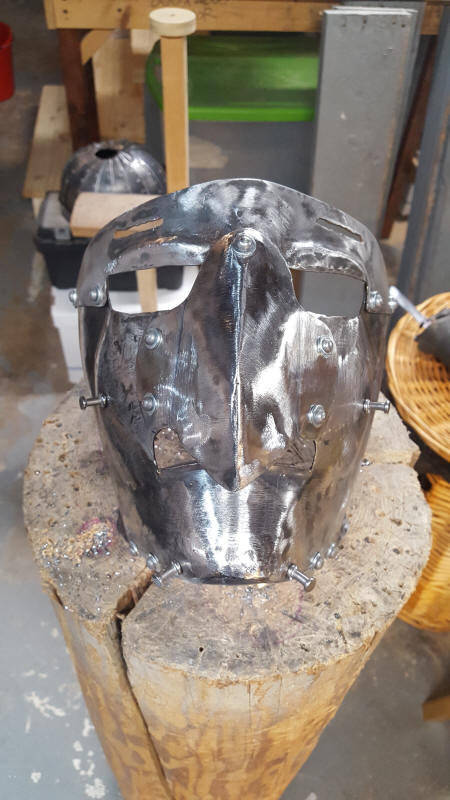
According to Sakakibara Kozan, "[t]here are various styles of lacquer for the outside of masks. Red (Shunuri) and Rust-colour (Sabinuri) are common in early pieces; most Nara examples are treated with the latter." (pg. 74) I will be using Neri Bengara Urushi (Dark Red Urushi) for the outer surface of the somen. I will be leaving the inner surface bare, so that I will be able to add padding and a cloth liner, and if the urushi fails, I will not end up with it in my eyes.
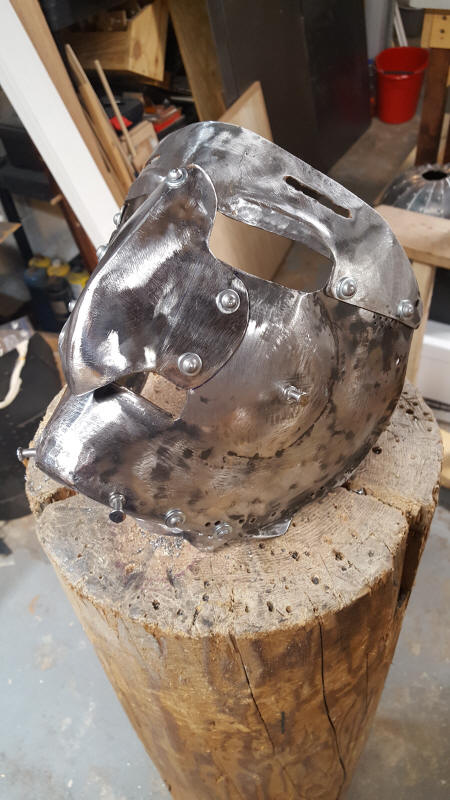
I started with a clean sanded somen
Layer 1 applied
Layer 2 applied
Layer 3 applied
Layer 4 and 5 applied (both layers use the same urushi mixture)
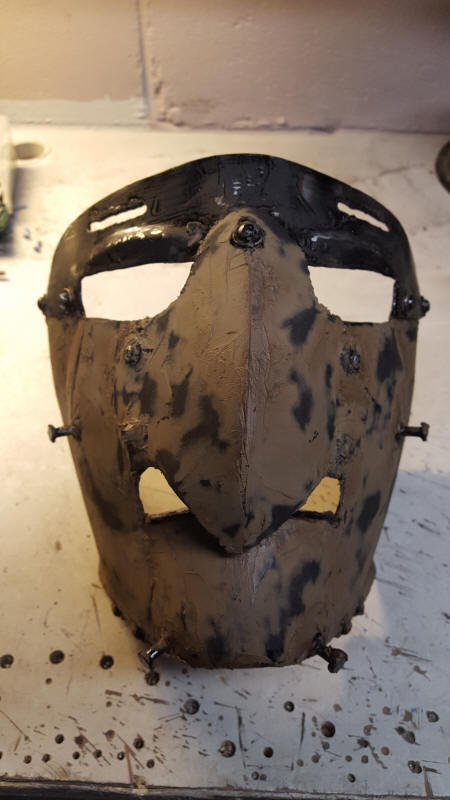
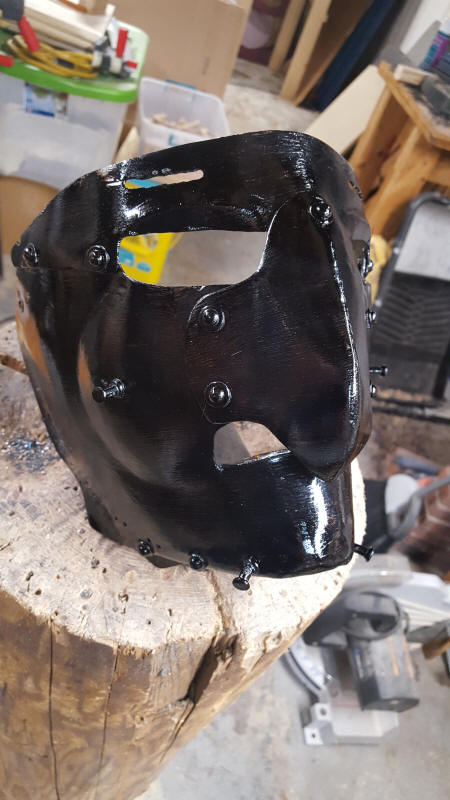
Layers 6, 7,and 8 applied (each layer is the same)
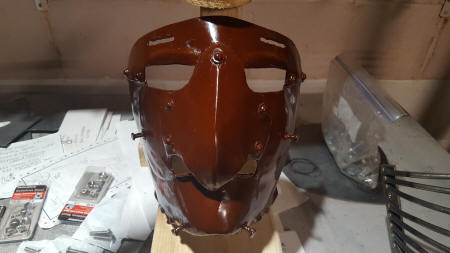
Layer 9 applied (same as the previous 3 layers)
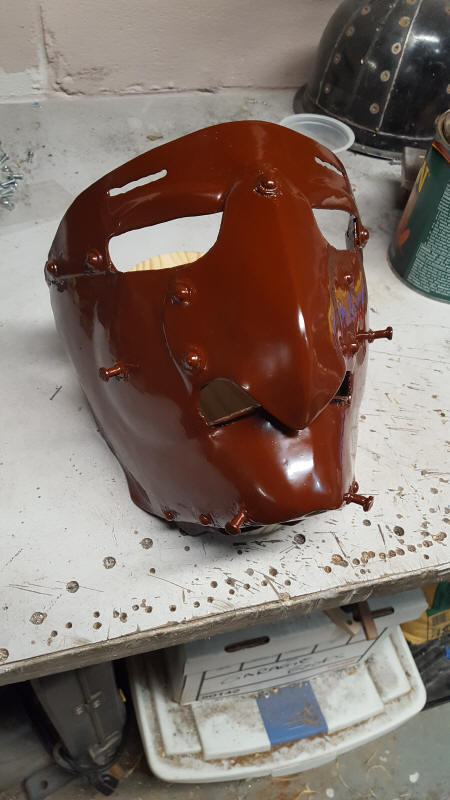
Layer 10 applied
Layer 11 applied
Pandikow, Wiebke. Silver Crane. Dec. 2012. "An Exchange Student's Research on URUSHI." 15 March 2018 <http://silver-crane.com/index.php/urushi/>.
Sakakibara Kôzan. The Manufacture of Armour and Helmets in Sixteenth Century Japan. Trans. by T. Wakameda. Revised by A.J. Koop and Hogitarô Inada (1912).
“Urushi”, the Beautiful and Dangerous Art of Japanese Lacquerware. 2 Aug 2016. Japan Info. 29 April 2018. <http://jpninfo.com/56468>.
Urushi Finish
I started by building the Hachi (Bowl).


Pandikow, Wiebke. Silver Crane. Dec. 2012. "An Exchange Student's Research on URUSHI." 15 March 2018 <http://silver-crane.com/index.php/urushi/>.
Sakakibara Kôzan. The Manufacture of Armour and Helmets in Sixteenth Century Japan. Trans. by T. Wakameda. Revised by A.J. Koop and Hogitarô Inada (1912).
“Urushi”, the Beautiful and Dangerous Art of Japanese Lacquerware. 2 Aug 2016. Japan Info. 29 April 2018. <http://jpninfo.com/56468>.